

9 On Your Side reporter Ally Kraemer got engaged in November. She will be writing about her wedding planning experiences until her wedding in August. Expect to see the good, the bad and the bridezilla. (Just kidding!)
CINCINNATI -- Designing wedding invitations is the most exciting part of my planning so far. It's also one of the most expensive.
I can't imagine spending more money on paper than I did on my cake, so I shopped around.
Ordering online is convenient, but once you start plugging things in, it gets really expensive really quick.
So I went to Designs by Dawson in Madeira. Dawson Bullock and her team are so incredible! Using a local vendor gives you the ability to totally customize every last detail.
I'm fairly crafty (I used to work for a scrapbook store in high school), so I didn't think making our invitations was that crazy.
Step 1: Find inspiration.
I looked around on Etsy for wedding invitatio designs I liked and found this one from Swell and Grand. The template is only $25, but we wanted to change a few things to match our slightly less traditional style. It was a good starting point.

Ally Kraemer's DIY wedding invitations: Step 2.
Step 2: Design the invitations.
No, you don't have to be a graphic designer! Basic working knowledge of Microsoft PowerPoint will do. I, however, don't even have that, so I called in my fiance, Jake.
We looked up popular wedding fonts. You can download them directly to PowerPoint to try out, and we decided on Stylish Calligraphy Demo and Kokila.
Put as many invitations/reply cards/reception cards on a page as you can. This saves money when you go to print, and you get the most out of that pretty paper.
We got two invites per page, four reply cards per page and four details cards per page.
Don't spend days deciding on font and wording. It doesn't have to follow any pattern; you can write 1st or first and no one will care. Make the invitations fit you and what you want!
Step 3: Size everything.
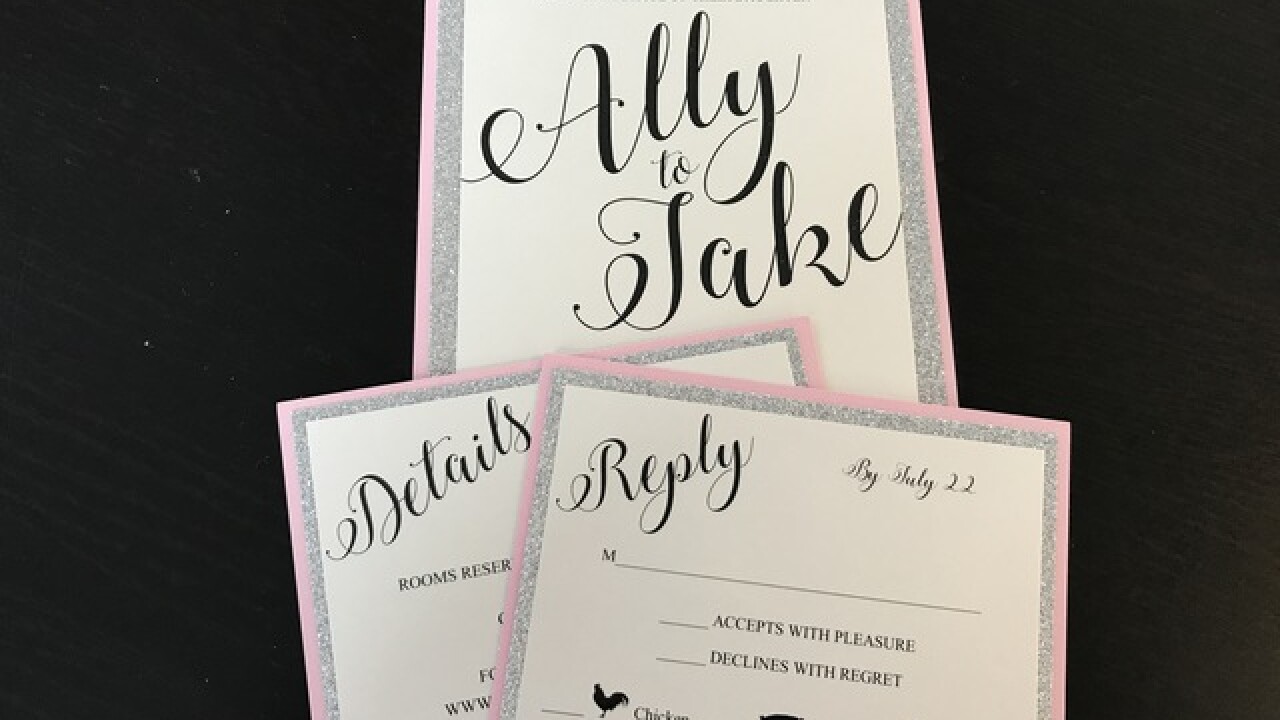
I want three layers for my invitations -- a pink shimmer backer, a silver glitter middle accent piece and the top layer, which is what the invite is actually printed on. To fit in the envelope, the largest piece can be 5 inches by 7 inches; simply size down from there. They don't have to match exactly, though, so play around with it.
- Pink backer: 5 inches by 7 inches
- Silver glitter: 4¾ inches by 6¾ inches
- Top piece: 4¼ inches by 6¼ inches

Ally Kraemer's DIY wedding invitations: Step 4
Step 4: Gather your supplies -- and don't pay full price for anything!
- Pink Paper from Michaels: 25 cents each. (Wait for a 50 percent off sale. I also had a bonus 25 percent off coupon.)
- Silver Glitter Paper from Hobby Lobby: $1 each. (The best deal I found was 50 percent off.)
- Quartz Metallic Paper from Staples: 24 cents each. (I ordered two boxes for 100 sheets.)
- Craft Tape from Hobby Lobby: About 68 cents each. (Buy the eight-pack refills and use a 40 percent coupon.)
- Paper Cutter from Staples: $35. (I think we got a better deal in store than the listed online price. Spend the money -- perfect, crisp cuts are worth it!)
- Invitation Envelopes from LCI Paper: 31 cents each. (I used a standard A7 envelope.)
- Reply Card Envelopes from LCI Paper: 26 cents each. (I used standard A2 envelopes.)

Ally Kraemer's DIY wedding invitations: Step 5a.
Step 5: Print everything.
As I said before, try to fit multiple invites and items on one page to save money on printing and paper.
I went to Staples in Hyde Park Plaza. Ask for Max; he helped us get everything aligned on the page just right and made suggestions on how we should cut the invites. If you give them dimensions, Staples will even cut them for you!

Ally Kraemer's DIY wedding invitations: Step 5b.
Black-and-white printing is 19 cents per page and it's $2 per cut.
We bought the paper cutter after we printed invites; looking back, I could have cut them myself.
Staples did a beautiful job, though, and for $25 I had professional-quality invites.

Ally Kraemer's DIY wedding invitations: Step 6.
Step 6: Cut everything.
Think of the process like an assembly line. Measure and cut every aspect of each piece ahead of time so you just have piles of paper. It makes gluing them all together that much easier.
If you measure things out on a 12-by-12-inch piece of paper, you will be surprised at how many pieces you can get out of each sheet. Keep your scraps! The silver glitter paper is expensive, and the skinny scrap I had left from each sheet worked perfectly for my matching table cards. I have a box of scraps that I can use in the future.
I only nicked my finger once, and it took me only a week to get rid of the glitter on my counter, clothes, shoes and hair. (How did it get in my hair?)

Ally Kraemer's DIY wedding invitations: Step 7.
Step 7: Get gluing.
Do not grab Elmer's Glue or a glue stick. I used what I call "glue runners." Buy the first one for 40 percent off at Hobby Lobby and then all you have to do is buy refills -- they're cheaper! Be sure to buy the permanent type: You don't want removable.
I probably used 25 rolls of this stuff, so buy a pack with your coupon every time you make a trip to Michael's or Hobby Lobby.
Same process here: I glued every single glitter piece to the pink piece. Then I went back through and glued the top invite portion to the glitter.
I think I re-watched three seasons of "The Real Housewives of Beverly Hills" in the process.
Step 8: The envelopes
We got the envelopes for invites and reply cards pretty cheaply online. LCI Paper does offer printing services, but if you're trying to save money, that isn't the way to go.
We have a LaserJet printer and, after some frustration, we used the "envelopes & mailing" tab to create our own labels. Our list of addresses was in an Excel spreadsheet and using "mail merge" we were able to format an envelope for each guest.
Reply envelopes were easy, simply putting the same address on the center of each one. But I had to sit there and push "OK" on the printer each time one printed -- I lost a little of my sanity there.
Step 9: Grab a drink.
That was a labor of love! If you choose to do your own invitations, hopefully you save money and add personal flair to your wedding.
If you want the PowerPoint templates we created, I'm happy to share. Just email me!
The total cost
It's hard to estimate the cost of each invitation, because I used a single piece of paper for multiple invites and reply cards. And I'm not including the cost of ink for my envelopes. We used the printer at my mom's house, so it was free!
If I had to estimate:
- Invites with envelopes: $1.15 each
- Reply and details cards: 71 cents each
- Total: $1.86 per invite set
That's crazy cheap, so if you're on a budget, make your invites and spend that money elsewhere!
What's next
I'm always looking for advice, so drop me a line at ally.kraemer@wcpocom
